Healers are vital to the success of any party venturing into a dungeon or taking on a deadly primal in the world of Final Fantasy 14. Unlike Astrologians, Scholars have been around since the game's inception, and they are potent healers who can use magical shields to protect their allies.
Scholars take the knowledge they accrued during their time as an Arcanist (find out how to unlock the Scholar Job here) and apply it to more defensive techniques, fighting alongside a faerie instead of a carbuncle. This can present a slight problem for anyone who hasn't spent the first 30 levels of the game healing as it's a whole new experience. Luckily, we have that covered.
The Faerie
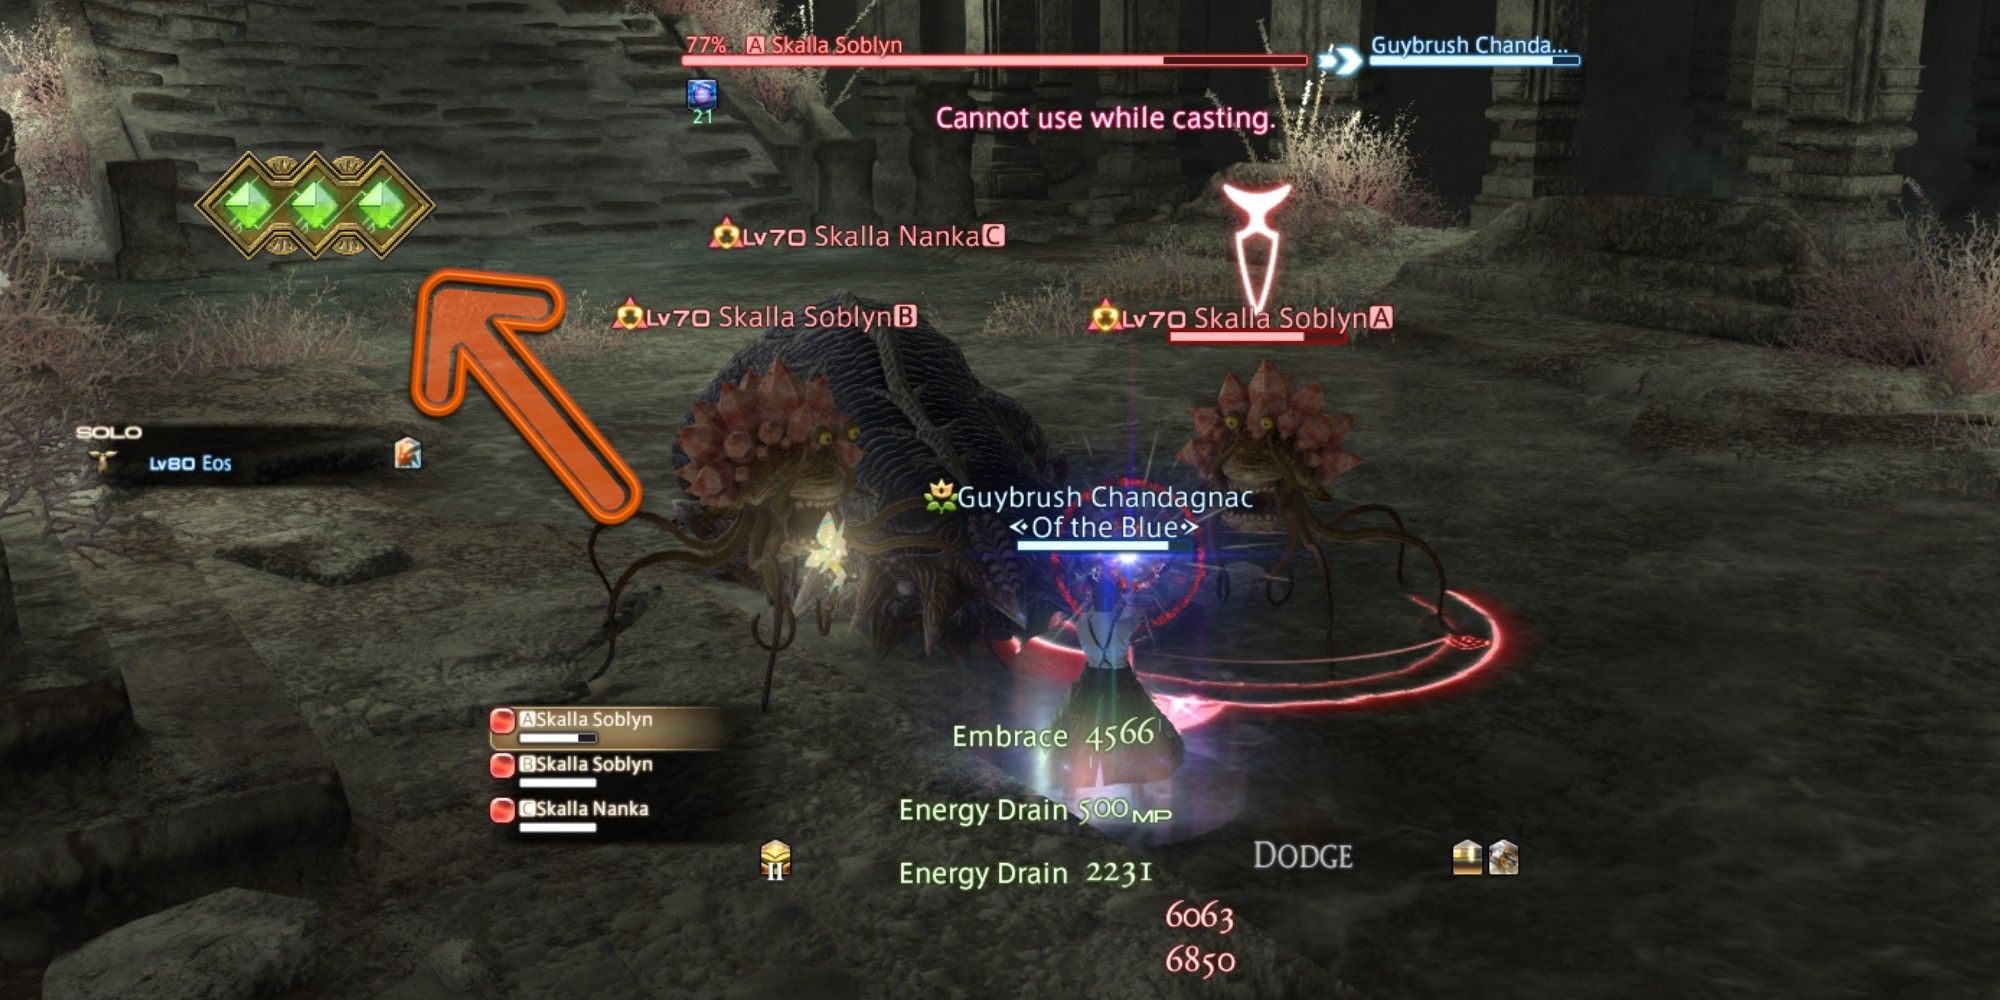
As you'd expect from the class so closely associated with Summoners and Arcanists, Scholars have a summoned 'pet' of their own. The Faerie is a healer's best friend that will automatically top up your allies and has some useful skills to activate in times of need.
You will have two faeries that you can summon, Eos and Selene. While these two helpers used to have mechanical differences (Eos would be better at healing while Selene could help improve the party's damage output) they are currently identical in all aspects apart from their coloration.
These faeries will use Embrace on allies who have lost HP to heal them up. They are really good at putting your allies' minds at ease while you concentrate on your DPS. Additionally, there are some skills that you can activate to make your faerie just that little bit more helpful.
- Whispering Dawn learned at level 20 will make your faerie cast an area-of-effect regen spell. This is great to use against bosses who like to hit the entire party all at once and for when you anticipate really hard-hitting blows.
- Fey Illumination learned at level 40 is a more proactive skill. It has the same area-of-effect as Whispering Dawn but instead grants all those affected a 10% bonus to healing received and 5% magic damage reduction. This is mainly great to use in emergencies before using high-powered healing spells like Lustrate and Indomitability.
- Fey Blessing learned at level 76 is a simple area-of-effect heal that you can add to your repertoire quite easily. It's quick to activate and can be used in emergencies to bolster your own massive heals, or simply used to let you keep your DPS up while averting deaths for as long as possible.
- This ability requires some Faerie Gauge (see below).
As you'll have noticed, all of these skills are area-of-effect skills. To that end, make sure that your faerie is in range of your allies before making it use one of these abilities, or it will be wasted.
The Aetherflow Gauge
One of the first things you'll need to know as a Scholar is how to use the Aetherflow Gauge. Luckily, this is something that you'll have in common with the Arcanist class so it shouldn't feel too alien. You will learn Aetherflow at level 45. This is an ability that will fill your gauge with three charges — these charges can then be used to perform powerful abilities to heal and shield your allies.
One of the things that can really mess up a Scholar's flow is running out of Aetherflow charges in an emergency. Aetherflow's cooldown is 60 seconds and Scholars do not get any other way to accrue charges until level 60, so it's important to learn how to manage your resources.
The following skills use Aetherflow Gauge charges.
- Energy Drain learned at level 45 is an instantly resolving damage move that takes a portion of the damage dealt and absorbs it as MP. This ability is most useful for spending spare Aetherflow charges when the next cast of Aetherflow is ready and you don't foresee any healing required in the near future. The MP drain feature of the ability is less useful as MP problems are largely a thing of the past thanks to the extremely helpful Role Action Lucid Dreaming.
- Lustrate also learned at level 45 is your first emergency healing move. It's an incredibly quick and powerful heal that is great for healing up tanks who have been hit with ultimate moves or allies who have just been raised from the dead. It is all too easy to accidentally spam this ability in times of panic, but it's sure to be your most reliable heal.
- Sacred Soil learned at level 50 is a placed area-of-effect ability that will summon a protective dome at a point of your choosing. Players within this area for the duration of the spell will take 10 percent less damage, and from level 76 will also receive some healing over time.
- Indomitability learned at level 52 is the area-of-effect version of Lustrate and is perfect for healing up after big boss attacks that hurt the entire party or during particularly nasty emergencies.
- Excogitation learned at level 62 is the final Aetherflow skill and is a great one to use on tanks. It will place a long-lasting (45 seconds) status on the target that will fire when they hit 50 percent HP. It will give them a strong heal automatically, consuming the status.
- If the target doesn't manage to lose that much HP, however, the heal will fire at the end of the status duration, meaning the heal might not be entirely wasted.
- Apart from tanks, this is also a great skill to use on allies who are getting hit by mechanics they aren't used to or on yourself for that extra insurance.
The Faerie Gauge
Upon completion of the level 70 Job quest, Scholars will learn how to use the Aetherpact ability. Simply learning this ability will enable the Faerie Gauge. The Gauge will increase in increments of ten whenever you use an ability that consumes an Aetherflow Gauge charge.
- The main ability that uses the Faerie Gauge is Aetherpact, which Scholars cast on an ally of their choosing. This will cause their faerie to form a Fey Union with that ally, providing very high healing over time whilst draining the Faerie Gauge gradually.
- This is a great skill that can be used to anticipate or react to huge damage and you'll only become better at using it as you get more acquainted with the challenges at hand.
- Fey Union lasts until the Faerie Gauge depletes or until you use Dissolve Union manually. You should dissolve the union when the target is fully healed and no longer in danger, or if you want to use any of the other faerie abilities that you have access to.
- Fey Blessing (see above) also consumes ten Faerie Gauge to trigger. This is a way that the Faerie Gauge can be used to provide area-of-effect healing rather than powerful single-target healing.
Seraph
The final very unique trait that the Scholar has is the ability to Summon Seraph, which is learned at level 80. This skill temporarily replaces your faerie with Seraph, who has a much stronger version of the faeries' Embrace skill. In addition to healing, Seraph's Seraphic Veil will grant a shield to their target.
Consolation is a skill that can be used whilst Seraph is summoned and is similar to Fey Blessing. However, it also grants targets a shield that has a greater amount of damage protection in the long run.
Summon Seraph is best used during the more tricky moments of an instance. It takes two minutes before they can be summoned again and only lasts for 22 seconds, so summoning them right before ultimate moves and during very large pulls in dungeons will get the most bang for your buck.
Heals And Shields
In addition to the various ways a Scholar can use their Aetherflow Gauge and their faerie to heal and shield their party, they have plenty of standard ways too. Until level 30, they rely on Physick to heal their party members, but this is soon outclassed by their ever-expanding toolbox.
- Adloquium is learned at level 30 and is the first introduction to shielding. This spell will both heal HP and put up a magical shield (a status known as Galvanize) on the target that will nullify damage based on how much HP is healed. If the spell is a critical hit, the shielding will be even more potent (a status known as Catalyze).
- Succor is learned at level 35 and is simply an area-of-effect alternative to Adloquium.
These two spells make up the bread and butter of healing when there are no Aetherflow Gauge charges to spare. Learning how to be the best Scholar possible will rely on using spells learned later in the Job to change these spells and make them more effective. Mastering these abilities will make sure you're always ready to keep your party healthy and ready.
- The first of these is Deployment Tactics learned at level 56. This ability should be cast upon an ally who has a magical shield and will copy that shield onto any surrounding allies who do not already have a shield. This ability is perfect for use when an ally is under the effects of Catalyze and has a much larger shield than usual thanks to a critical spell hit.
- Alternatively, Emergency Tactics learned at level 58 is quite self-descriptive. This ability will convert the next Galvanize or Catalyze status into extra healing. Simply put, this ability will consume a spell's shielding effects for equivalent healing.
- This is particularly effective when used with Succor to heal up after party-wide attacks, as shields are temporary and healing is more permanent for characters who shouldn't be drawing aggro.
- Recitation is learned at level 74 and allows you to use Adloquium, Succor, Indomitability, or Excogitation for free (i.e. without using MP or Aetherflow charges) whilst also ensuring that the spell hits for critical healing.
- A fantastic way to use this is to use Recitation to ensure a critical Adloquium, which will apply a strong Catalyze. Then use Deployment Tactics to spread that very powerful Catalyze shield to all surrounding allies.
Offensive Spells
The Scholar's usual DPS rotation is incredibly simple and consists mainly of two spells. Ruin/Broil is the main damage spell that you'll spam over and over, while Bio/Biolysis is your damage-over-time that you'll cast once every 30 seconds or so to make sure it's kept up at all times.
Ruin II is an instant-cast spell that you can use to keep the damage up whilst running or slide-casting to avoid area-of-effect spells, and Energy Drain can be used to increase your DPS a little bit by weaving it into your usual Ruin/Broil rotation if you have excess Aetherflow Gauge charges.
The only other ability of interest here is Chain Strategem, which is learned at level 66. It's a debuff spell that increases the number of critical hits that an enemy takes and is best saved for bosses and unusually tough enemies as it has a long cooldown of two whole minutes.
Art of War is your area-of-effect spell and is unique in that its area is centered on the caster, so you'll have to get up close and personal during large dungeon pulls to get the most out of it. This can be dangerous and it may be a better idea to hang back and just spread Bio/Biolysis around if you aren't too confident in your chance of survival.
Combat Strategies
A decent amount of excelling as a Scholar relies on knowing how a particular fight goes. Knowing when the big hits are coming lets you prepare accordingly with Sacred Soil and Deployment Tactics. Knowing that a boss has a particularly brutal tankbuster might affect how well-stocked you keep your Aetherflow Gauge.
Really though, practice is the best way to get to grips with this Job. The difference between a Scholar who just spams Physick and Adloquium and a Scholar who knows how and when to use Emergency Tactics and Recitation is palpable, so experiment with the abilities you have and don't be afraid to mix it up. The Scholar's toolkit is huge and has so many options available to it.
Specific things to keep in mind include:
- Encourage your party to gather up inside your Sacred Soil when party-wide attacks are coming.
- Emergency Tactics followed by Succor is a good combo to refill the party efficiently.
- Make sure you know your Swiftcast and Resurrection hotkeys off the top of your head.
- Use Dissipation in emergencies where you're in great need of Aetherflow charges, but be aware that the Faerie Gauge will not increase until you resummon your faerie.
- Remember that you must summon your faerie every time you swap to Scholar, especially if you're swapping to Scholar to begin a dungeon or a trial.
Gearing A Scholar
For the most part, gearing as you level is a very simple process in Final Fantasy 14. For the majority of A Realm Reborn, up-to-date equipment can be very easily purchased from vendors in the world.
- Since leveling is a very quick process at low levels, try to update your gear every 5 or so levels — focus on getting up-to-date Books and Robes before anything else as they grant the biggest upgrades. Remember that these can be made using the Alchemist and Weaver crafting classes respectively if that's something you're interested in.
- Once you hit level 50 and every ten level increment after that, you'll want to start utilizing the Tomestone Exchange vendors who can be found across the world. These merchants allow you to trade Allagan Tomestones of Poetics for incredibly powerful equipment that should last you a long time. While these vendors are first found in Mor Dhona (level 50 equipment), Idyllshire (level 60 equipment), and Rhalgr's Reach (level 70 equipment), completion of certain quests will make more useful Sundry Splendors vendors show up at the main settlements.
- A full set of Augmented equipment costs 4,335 Allagan Tomestones of Poetics but will last you over six levels before anything becomes obsolete. For example, the Augmented Ironworks healer set (Item Level 130) should last you until around level 56 or 57 before the items that drop from dungeons are any better, but can feasibly last you until level 60 without being too weak. And once you hit level 60, you can simply upgrade to the Augmented Shire Preceptor set (Item Level 270) using more Tomestones.
- From levels 71 to 79 you'll want to start using dungeons to upgrade your weapons and armor. Once you hit level 80, you can start exploring alternative methods also, such as your artifact equipment, high-level crafting recipes, and alliance raids.
| Vendor Location | Unlock Requirement | Equipment Level | IL |
|---|---|---|---|
| Lima Lominsa Upper Decks (X:9.1, Y:11.1) | Complete The Ultimate Weapon | 50 | 110-130 |
| Ul'dah - Steps of Nald (X:9.1, Y:8.3) | Complete The Ultimate Weapon | 50 | 110-130 |
| New Gridana (X:11.9, Y:12.3) | Complete The Ultimate Weapon | 50 | 110-130 |
| Foundation (X:10.5, Y:11.8) | Complete Heavensward | 60 | 175-275 |
| Kugane (X:12.2, Y:10.8) | Complete Stormblood | 70 | 320-405 |
Materia
Melding materia isn't as important during the leveling process as just having the right gear, but it can make a world of difference in the endgame. As Scholars benefit tremendously from critical hits (thanks to Adloquium) you'll want to meld as much Critical Hit as possible onto your gear.
After Critical Hit, you really have a choice for your secondary stat. Having some Direct Hit is crucial to being able to even make a Direct Hit that will improve your DPS, but improving your Determination is a well-balanced option for improving your healing output as well as your DPS.
While Piety seems like a good choice, you really shouldn't need to meld any Piety materia to your equipment as it's likely to be high enough anyway.
Playing Solo
As a final note, it's good to know that Scholar is a really good class for playing solo, just like Paladin. Thanks to the passive healing of the faerie, it is quite self-sufficient and can quite safely solo a lot of content.
Once you hit level 70 and get nicely equipped with Augmented gear, a Scholar can comfortably solo a great deal of A Realm Reborn content including endgame dungeons. At level 80, with the comparable gear, you can easily solo the majority of both A Realm Reborn and Heavensward. This makes Scholar a great Job for unlocking and completing dungeon and trial quests without needing to queue for the duty finder — and then farming those dungeons and trials for mounts, minions, and cool gear.


