The Coils of Bahamut are an extremely difficult series of end-game raids in Final Fantasy 14. The first of them, The Binding Coil of Bahamut, is a trial all its own. If you think you're up to the challenge, read on to learn what you'll be up against.
Related: Final Fantasy 14 - Smileton Dungeon Guide
The Binding Coil of Bahamut is divided into five different raids, called Turns. Each requires a minimum Item Level of 82 to enter, so all of your teammates will need to be up to par before you begin.
How To Unlock The Binding Coil of Bahamut
Before you can even attempt The Binding Coil of Bahamut, you'll have to finish some top-level quests that pit you against classic Final Fantasy foes. Once you've completed The Bowl of Embers (Hard), The Howling Eye (Hard), and The Navel (Hard) by defeating Ifrit, Garuda, and Titan respectively, The Binding Coil of Bahamut will unlock. You'll also need to have attained Level 50, but chances are pretty good that if you've completed the requisite quests you're already there.
Once you've met all the requirements, head to the Waking Sands and meet Urianger at (X:6, Y:4). He will issue a quest titled 'Primal Awakening' and send you to Wineport in Eastern La Noscea. Once there, speak with Alisaie at (X:21.1, Y:21.9). She has quite a lot to say; once the conversation is ended, head due east to Castrum Occidens.
Fight your way through the fortress until you find the Exploratory Site Gate at (X:28.6, Y:19.5). Defeat the enemies guarding the gate so you'll have time to inspect it. Once you've done so, return to the gates of Wineport and report to J'brohka at (X:21.7, Y:22.3). She will relay your findings to Alisaie, completing Primal Awakening and unlocking The Binding Coil of Bahamut.
Guide To The Binding Coil of Bahamut - Turn 1
The first Binding Coil of Bahamut raid consists of two boss fights, with a few mobs in between. The first boss, the Allagan Defense System, requires the party to defeat it quickly. The second boss, Caduceus, requires patience and strategy.
Allagan Defense System
As soon as your party enters the Imperial Exploratory Site, you'll come face-to-face with the Allagan Defense System, or ADS. You must defeat the ADS within four minutes of encountering it. During the fight, you'll see a message in the middle of your screen saying "Charge Complete in [X] Clicks." Each click is one minute, and when the ADS's charge completes, it will explode — killing your entire party and ending the raid.
Moves
| High Voltage | - Inflicts Paralysis to the entire party that lasts 30 seconds and cannot be removed.
- Always attempt to interrupt this attack, whatever it takes to do so.
|
| Repelling Cannon | - Point-Blank AoE attack.
- Melee characters should move out of range as soon as they see this attack coming.
|
| Piercing Laser | - Line AoE attack.
- ADS will aim this attack at a single target but will hit anyone caught in the zone.
|
Strategy
- The ADS uses its moves in sequence; High Voltage is first, followed by Repelling Cannon, then Piercing Laser. It repeats this pattern until it is destroyed or its charge is completed.
- Nodes will periodically spawn at the entrance to the area. These should be destroyed before they can reach the ADS, as they will heal it and boost its damage output if it's allowed to connect.
Caduceus
At the far end of the area, you'll find the black tiles of Caduceus' lair. Be sure your party is healed up and your buffs are in place before triggering the fight.
Moves
| Steel Scales | - Caduceus gains a permanent increase of 50 percent to the physical damage it deals.
- Steel Scales can stack up to eight times for a massive 400 percent maximum bonus.
- Each time Caduceus comes into contact with a dark matter slime, it devours the slime and loses one stack of Steel Scales.
- Eating a dark matter slime heals Caduceus based on the remaining HP of the slime; lower HP means less healing.
|
| Regorge | - Caduceus fires a poison spray at a random single target.
- Spawns a puddle of poison centered on the target that deals damage over time to anyone standing in it.
|
| Whip Back | - Caduceus makes an arcing attack to its rear.
- This move is only used if a player character is behind Caduceus.
|
| Hood Swing | - Caduceus makes a large arc attack with high damage.
- This attack is not telegraphed; if you're not a tank, try to stay away from Caduceus.
|
Strategy
- The boss of Turn 1 lurks among large hexagonal tiles. Watch these tiles when they begin to glow - players caught on a tile when they activate will spawn a dark matter slime, which will attack immediately. The key to winning this fight is to weaken the dark matter slimes but not kill them. Get their HP as low as possible without destroying them, then let Caduceus eat them to remove Steel Scales stacks.
- Dark matter slimes will explode if there is not a player character nearby, so you'll need to have an off-tank shepherd them over to Caduceus without wandering too far.
- Standing on the yellow crystal paths (i.e., anywhere but the hexagonal tiles) will inflict Bleed as long as Caduceus is alive.
- Once Caduceus has lost about one-third of its maximum HP, it will split into two copies of itself. Each copy only deals half the damage of the original, but both keep all the stacks of Steel Scales that Caduceus had when it split. Draw one copy away from the main fight; if they are allowed to remerge they will increase the rate at which Steel Scales gains stacks.
- Try to manage the fight so that both copies are defeated at around the same time. When one copy dies, the remaining copy Enrages, which increases the rate at which Steel Scales gains stacks.
Related: Final Fantasy 14 - How To Get The Level Checker Mount
Guide To The Binding Coil of Bahamut - Turn 2
Turn 2 is essentially one large boss fight. The main enemy is powered by mini-bosses scattered throughout the area. Hunting down and destroying the nodes will remove capabilities from the boss itself. You won't be able to take your time, though - once you enter combat a twelve-minute timer starts. If the countdown hits zero, the entire area will detonate and the raid will fail.
The main boss possesses all the moves available to each node that is still alive. However, each node that dies provides a buff to all remaining nodes, including the ADS itself. Plan your route carefully to eliminate the moves you don't want to see in the final battle. The three basic moves, available to all nodes, cannot be removed.
Node Locations
| Room Number | Node | North Exit | South Exit | East Exit | West Exit | Buff On Node Destruction |
| Sector 1 | Monitoring Node | N/A | Sector 6 | Sector 3 | Sector 2 | Physical Damage Up |
| Sector 2 | Sanitary Node | Sector 1 | N/A | Sector 3 | Sector 4 | Slashing Resistance Up |
| Sector 3 | Defense Node | Sector 1 | Sector 5 | N/A | Sector 2 | Slashing Resistance Up |
| Sector 4 | Attack Node | Sector 6 | Sector 7 | N/A | Sector 2 | Blunt Resistance Up |
| Sector 5 | Disposal Node | N/A | N/A | Sector 3 | Sector 6 | Magic Resistance Up |
| Sector 6 | Main ADS | Sector 1 | Sector 7 | Sector 5 | Sector 4 | N/A (Destroying the ADS wins the raid) |
| Sector 7 | Quarantine Node | Sector 6 | N/A | N/A | Sector 4 | Haste |
Moves
| Move | Node(s) | Effect |
| High Voltage | All | - Inflicts Paralysis to the entire party that lasts 30 seconds and cannot be removed.
- Always attempt to interrupt this attack, whatever it takes to do so.
|
| Repelling Cannon | All | - Point-Blank AoE attack.
- Melee characters should move out of range as soon as they see this attack coming.
|
| Cleave | All | - Arc attack made to the Node's front.
- Inflicts 1 stack of Vulnerability on hit.
- The main tank should tag out once they have 4-5 stacks of Vulnerability.
|
| Vacuum Wave | Monitoring Node | - Inflicts minor damage to all party members.
|
| Ballast | Sanitary Node | - Three concentric rings appear around the enemy. Player characters caught in the rings take damage and are knocked back.
- The rings do not extend behind the enemy and can be avoided by hiding there.
|
| Chain Lightning | Defense Node | - Hits a random player character with lightning damage.
- Lightning jumps to a random nearby player character, dealing equal damage.
- Lightning continues to jump until no viable targets are in range.
- Spread out to give the lightning fewer chances to jump.
|
| Gravity Field | Attack Node | - An AoE appears, slowing the movement of player characters caught in it.
- The Gravity Field also deals random amounts of damage.
|
| Firestream | Disposal Node | - Five lines of fire emanate from the user in a star shape.
- The flames inflict damage over time.
|
| Allagan Rot | Quarantine Node | - Infects a player character with Allagan Rot.
- If Allagan Rot expires, it deals massive damage to all party members.
- An infected player can pass Allagan Rot to another player. Doing so removes it from the spreading player and restarts the timer for the new victim.
- Once a player has passed Allagan Rot to someone else, they become immune to it until no player is infected.
- Before starting the raid, plan who will pass the Rot to whom, and avoid the currently-infected player to keep the timer extended for as long as possible.
|
Recommended Route
Most teams prefer to attack Sectors 1, 3, and 5 before moving on to fight the ADS. This removes the powerful Chain Lightning and Firestream attacks while not giving the boss too many stacking buffs.
Guide To The Binding Coil of Bahamut - Turn 3
After two tough boss fights, Turn 3 could be a welcome reprieve. There are mobs here, but they shouldn't be anything your team can't handle.
- To navigate this area, you'll use jump pads on the ground to launch yourself and your party members through the air.
- Aim for the blue rings to follow the correct path and activate the Silent Terminals to complete the Raid.
- The direction the jump pads launch characters can be changed by standing on the outer ring. It's best to assign one player to set the pads in the right direction before the party progresses.
- If you don't mind a detour, there are treasure chests at (X:10.7, Y:10.7) and at (X:10.0, Y:11.1).
Related: Final Fantasy 14 - Learning To Lali-Ho Quest Walkthrough
Guide To The Binding Coil of Bahamut - Turn 4
The fourth Turn of the Binding Coil is also without a boss fight, but you'll have to face a veritable horde of enemies instead. They come in six waves, so be ready for a rapidly changing. Note that a new phase won't wait for the previous phase to be defeated, spawning after roughly one minute whether or not enemies are still standing.
| Phase | Enemies | Notes |
| Phase 1 | | - Clockwork Bugs heal themselves whenever they deal damage.
- Use AoEs to eliminate as many Clockwork Bugs as possible.
- Debuffs that reduce damage can slow the rate at which the Clockwork Bugs recover.
|
| Phase 2 | - 2x Clockwork Knight
- 2x Clockwork Soldier
| - Clockwork Knights reflect magical damage on the attacker.
- Clockwork Soldiers are immune to physical damage until their Stoneskin is destroyed.
- Have your magic DPS attack the Clockwork Soldiers while physical DPS handles the Clockwork Knights.
|
| Phase 3 | - 1x Dreadnought
- 4x Clockwork Bug
| - The Dreadnought will eat any Clockwork Bugs that get close to it, healing itself and gaining a damage buff.
- The Clockwork Bugs spawn too close to the Dreadnought to prevent it from eating them, so focus on the Dreadnought right away.
- The Dreadnought must be destroyed before Phase 4 begins. Otherwise, it will eat the Clockwork Bugs that spawn, healing itself and getting even more damage buffs.
- The Dreadnought has a powerful sweeping attack to its front, so non-tanks should stay behind it whenever possible.
|
| Phase 4 | - 4x Clockwork Bug
- 2x Spinner Rook
| - Spinner Rooks have a spell called Pox which affects players in a cone in front of them. Anyone caught in the Pox will have their maximum HP reduced by 1,000.
- Tanks should pull the Spinner Rooks so that they are facing away from the rest of the party and try to dodge Pox when it fires.
|
| Phase 5 | - 1x Dreadnought
- 1x Clockwork Knight
- 1x Clockwork Soldier
| - If there are still any Clockwork Bugs left when this phase begins, finish them off right away so the Dreadnought can't eat them.
- Break off a few teammates to deal with the Clockwork Knight and Clockwork Soldier (don't forget their immunities) while the rest of the party focuses on the Dreadnought.
|
| Phase 6 | - 1x Dreadnought
- 1x Spinner Rook
- 1x Clockwork Knight
- 1x Clockwork Solider
- 2x Clockwork Bugs
| - You may be able to destroy one Clockwork Bug before the Dreadnought can eat it, but it's unlikely you'll get both.
- Destroy the Spinner Rook first to keep it from casting Pox.
- Have your main tank hold down the Dreadnought until it's the only enemy left, then focus on it as a team to finish it off.
|
Guide To The Binding Coil of Bahamut - Turn 5
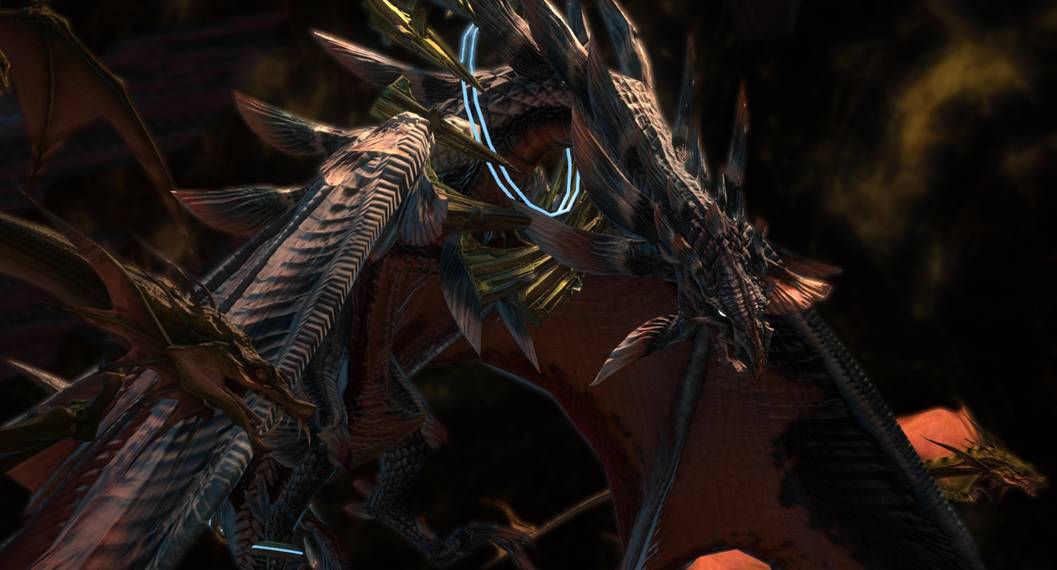
The final phase of The Binding Coil of Bahamut is a massive boss fight against Twintania. The mighty dragon has multiple phases and is the most powerful enemy in A Realm Reborn. When the fight begins, a purple barrier of flames encircles the area. Stepping outside the barrier results in instant death, so stay as far away from it as you can!
Whenever a new phase begins, Twintania drops a Neurolink at her current location. Standing in a Neurolink causes players to deal and receive less damage and healing. Familiarize yourself with the specifics of each phase and the attacks you can expect from Twintania, and teamwork will do the rest.
Twintania's Phases
| Phase | HP Percentage Remaining | Enemies Added | Notes |
| Phase 1 | | | - The Scourges will cast Liquid Hell (see below).
- Eliminate all three Scourges before focusing the party's efforts on Twintania.
|
| Phase 2 | | | - The player targeted by Conflagration should run underneath Twintania before the dome lands.
- This will allow the party to immediately switch to attacking the dome without having to move off of Twintania.
|
| Phase 3 | | | - The end of Phase 3 is not triggered by reducing Twintania's HP, since she cannot be targeted at this time.
- Instead, Phase 4 begins when Twintania's attack cycle is completed.
- Asclepius and the Hygiea enter the fight after Twintania's first set of three Divebombs.
- When a Hygiea dies, it explodes and applies a debuff to all targets (friend or foe) in range. This debuff increases the damage taken by the victim and can stack.
- Kill the Hygieas when they are near Asclepius to ensure the debuff lands on him.
- There is a 45--second break between Divebomb sets. Use this time to deal with Asclepius and company.
- After her second set of three Divebombs, Twintania lands and uses Aetheric Profusion before beginning Phase 4.
|
| Phase 4 | | - 1x Dreadknights per cast of Unwoven Will
| - Keep moving at all times to avoid Twister.
- Each Dreadknight will appear at the center of the arena.
- If a Dreadknight reaches its target (the character stunned by Unwoven Will) it will slay them instantly.
- Kill Dreadknights as quickly as possible before returning to Twintania.
|
| Phase 5 | | | - You'll need to manage Plummet, Death Sentence, Liquid Hell, and Hatch during this phase.
- Stay coordinated with your team and remember the strategies for dealing with each move.
|
Twintania's Moves
| Name | Phase | Notes |
| Plummet | All except 3 | - Twintania makes an arcing attack to her front.
- Plummet deals large amounts of damage, so tanks should keep her faced away from the rest of the party.
|
| Death Sentence | All except 3 | - Twintania deals a large amount of damage to the party member that has generated the most Enmity with her.
- Twintania deploys Death Sentence once every 30 seconds or so - healers need to be ready.
- From Phase 2 onward, Death Sentance also inflicts Infirmity to its target, limiting the amount of healing they can receive.
|
| Fireball | 2 | - Targets a random player.
- Divides 13,000 damage between the primary target and all players and pets within the AoE
- The fewer characters are hit by Fireball, the longer the countdown on the subsequent Conflagration lasts (see below).
|
| Conflagration | 2 | - Places a dome over a random player.
- Characters inside the dome cannot move and suffer fire damage over time.
- Characters inside the dome cannot be damaged or healed by any source other than Conflagration. This means that players targeted by other attacks can run inside the dome to negate the incoming damage.
- Once it appears, the dome will explode when its countdown reaches zero.
- The dome can be destroyed by attacks. Destroying it before the countdown ends prevents the explosion.
|
| Divebomb | 3 | - Twintania targets a random player, damaging and knocking back nearby targets.
- Group the party in the ditch near the purple barrier and run up the hill to avoid the attack.
- Be careful not to get knocked out of the combat zone - crossing the purple barrier means death.
- Twintania uses Divebombs three times, with six seconds between each attack.
- After the first set of Divebombs, there is a 45-second delay before the second set.
- After the second set of Divebombs, Twintania lands and begins Phase 4.
|
| Aetheric Profusion | 3 & 5 | - Twintania deals massive damage to all players.
- The only way to survive is to be standing on a Neurolink when the attack goes off.
- Players who are badly damaged or suffering the damage debuff from a Hygiea are in danger of dying, even if they are on a Neurolink.
|
| Twister | 4 | - Three random targets have a tornado spawned under them when Twister finishes casting.
- Keep moving while Twintania is casting, and keep your distance from other players.
- Twisters remain in play - any player character that touches them is killed instantly.
|
| Unwoven Will | 4 | - Stuns a random target until the Dreadknight is destroyed
- The Dreadknight will prioritize the target stunned by Unwoven Will.
- Spread out near the edges of the area so the Dreadknight has a long walk to its target.
|
| Liquid Hell | 5 | - Liquid Hell is also cast by the Scourges of Meracydia in Phase 1.
- A pool of lava spawns under a random target, dealing damage immediately as well as damage over time to all players standing in it.
- Scourges cast Liquid Hell one at a time.
- Twintania casts Liquid Hell five times in rapid succession at the same target. If you're targeted, move along the outer edge of the arena to keep the pools away from your teammates.
|
| Hatch | 5 | - Twintania launches an egg at a random target.
- The egg explodes for massive damage upon contact with any player (even if they aren't the main target).
- Have your off-tank hold Twintania directly over a Neurolink to easily absorb each egg as it's deployed.
|
Next: Final Fantasy 14 - How To Defeat Zenos in Endwalker