Pandaemonium is the primary raid in Final Fantasy 14: Endwalker. It sends players through the Four Circles of Asphodelos, facing some of the most dangerous battles yet seen in the game. Your group will need to be fully prepared to take on this challenge.
Related: Final Fantasy 14 - The Binding Coil of Bahamut Walkthrough
Each Circle contains a powerful boss, and each of them requires a different strategy to defeat. We've got all the information you need to conquer Asphodelos, including how to unlock the raid itself. Even armed with this knowledge, you'll still have the fight of your life ahead of you — you have been warned!
How To Unlock Pandaemonium
Once you've completed the Endwalker storyline by defeating Zenos, visit Nemjiji in Old Sharlayan at (X:9.6. Y:11.9). She will ask you to travel to Aporia and speak to Claudien, who is located at (X:8.6, Y:27.4, Z:1.9). Doing so triggers a lengthy cutscene, at the end of which your next step will be to visit the Ocular. It can be accessed by visiting the Crystarium and speaking to the Gatekeep at (X:13.5, Y:11.3).
At the Ocular, proceed straight ahead to the Portal. You'll be teleported to a new area where you'll meet a character in white robes named Themis. After the cutscene, speak to Themis once more to complete The Crystal From Beyond quest. Pandaemonium and the Asphodelos raids will become available through the Duty Finder.
NOTE: All party members must have an Item Level of at least 565 to be eligible to participate in an Asphodelos raid.
Guide To The First Circle of Asphodelos: Erichthonios
The first boss in Asphodelos is Erichthonios, an armored monstrosity who swings dangerous flails. The combat area is quite small, and stepping outside the square border around the edge means instant death — be extremely careful with your movements in this fight! Erichthonios will begin by using Gaoler's Flail, Pitiless Flail, True Holy, Warden's Wrath, and Heavy Hand. He will then move through a cycle of Intemperance followed by a cycle of Shining Cells. After that, he will alternate between Intemperance and Shining Cells, mixing in his basic attacks to keep players on their toes until he is defeated.
Erichthonios' Moves
| Move | Notes |
| Gaoler's Flail | - While casting, Erichthonios will swing one of his two flails.
- When the cast completes, Erichthonios swings the flail, damaging all opponents on the same side of him as the flail, regardless of range.
- When he starts casting, move to the other side to avoid damage.
- Tanks should try to manipulate Erichthonios' facing to minimize impact.
|
| Pitiless Flail | - Erichthonios targets a random player with a line AoE.
- All players hit by the attack are knocked away from Erichthonios, potentially sending them out of the arena and killing them.
- The targeted player should get as close to Erichthonios as they can, ideally positioned so they will be knocked towards a corner and therefore have the longest distance to travel before crossing the barrier.
- Other players should scatter to try and avoid the AoE entirely.
- Once Pitiless Flail hits, gather the group around the player that was targeted to prepare for True Holy.
|
| True Holy | - True Holy is always cast immediately after Pitiless Flail, targeting the same player.
- Heavy damage is distributed between all players hit by the spell.
- Clump everyone together around the target to share damage evenly.
|
| Warden's Wrath | - This attack has a long casting time. Use the opportunity to prepare defenses and healing.
- Once it is cast, Warden's Wrath damages all players.
|
| Heavy Hand | - This is a powerful, single-target attack. Be ready to heal the main tank when Heavy Hand lands.
|
| Intemperance | - Divides the combat area into four quadrants, each with a tower of red or blue crystals in the middle.
- The order of the crystals in each quadrant is random.
- Additionally, each player will be primed with a red or blue triangle over their head, indicating that they are Overwhelmed By Fire or Overwhelmed By Cold, respectively.
- Intemperance is followed by three casts of Intemperate Torrent.
|
| Intemperate Torrent | - The bottom crystal on each tower explodes.
- Players Overwhelmed By Fire will take fire damage if they are in the same quadrant as an exploding red crystal.
- Players Overwhelmed By Cold will take cold damage if they are in the same quadrant as an exploding blue crystal.
- To avoid damage, stay in a quadrant whose bottom crystal is the opposite color from the triangle you were marked with by Intemperance.
- Regardless of whether they take damage, a player's triangle will change color to match that of the last crystal that exploded near them.
- Keep moving into opposite-colored quadrants to prevent damage.
|
| Shining Cells | - Damages all players.
- Changes the combat area to a circle, divided into alternating blue and red wedges like a dartboard.
- Shining Cells is followed by repeated uses of Aetherchain.
|
| Aetherchain | - While casting, Erichthonios is orbited by colored orbs.
- When the cast completes, all players standing on a tile that matches the color of the orbs will suffer heavy damage.
- Move to a tile of the opposite color before the spell is finished.
|
| Aetherflail | - Identical to Aetherchain, but Erichthonios uses Gaoler's Flail simultaneously as well.
- Not only will players need to stand in a tile of a different color than the orbs, but they will also need to move to the opposite side of Erichthonios to avoid the flail.
|
| Slam Shut | - Slam Shut is only used when the arena is in its "dartboard" formation (i.e., after Shining Cells has been used).
- This attack damages all players and returns the combat area to its original square shape.
|
Guide To The Second Circle of Asphodelos: The Hippokampos
The Hippokampos excels at dealing damage to the entire party at once. Healers will need to be at the top of their game to keep everyone on this side of the grave. Be sure to keep an eye on the Hippokampos' cast timers and don't let yourself be caught off-guard! Note that this battle also has a rectangular barrier that cannot be crossed, on pain of death.
The first phase of this fight sees the Hippokampos attack with Murky Depths, Doubled Impact, and Spoken Cataract. Once it uses Sewage Deluge, the terrain will change dramatically - stay out of the water! Like Erichthonios, the Hippokampos will start to use its moves in conjunction once it's gone through a full cycle of each, so be ready for anything.
Hippokampos' Moves
| Move | Notes |
| Murky Depths | - Murky Depths damages all players.
- This attack cannot be avoided by any means; you'll just have to be ready for it when it lands.
- Use the cast time to prepare.
|
| Doubled Impact | - This powerful attack is likely to kill any non-tank it hits.
- Tanks must ensure that they are the target to protect their teammates.
|
| Spoken Cataract | - The Hippokampos moves to the center of the combat zone.
- Its head and body will simultaneously prepare separate attacks.
- The Head hits all players in the half of the arena that it is facing (look for a red arrow to denote the direction).
- The Body hits all players directly in front or to its rear, indicated by a yellow zone.
- The only safe place is in a corner of the arena behind the Head's attack zone.
- The exact area of both attacks is randomized each time Spoken Cataract is used.
|
| Sewage Deluge | - Sewage Deluge deals damage to the entire party.
- Changes the arena, creating four raised platforms connected by grates.
- Standing in the water causes damage over time and inflicts Dropsy.
|
| Tainted Flood | - The Hippokampos targets all players with individual circular AoE attacks.
- Spread out as much as possible while Tainted Flood is being cast to prevent any player from being hit more than once.
- There are four platforms and four grates, so one player on each should provide enough distance to space everyone out without having to go into the water.
|
| Shockwave | - The Hippokampos targets one of the four platforms and leaps to it.
- All players are knocked back from the Hippokampos when it lands.
- Stand so that you'll be knocked along the grate rather than into the water - or worse, outside of the arena!
|
| Predatory SIght | - Predatory Sight damages each member of the party.
- This damage cannot be avoided.
- Additionally, any player who is not touching another player when they are hit by Predatory Sight is inflicted with a stack of vulnerability.
- Use the buddy system to avoid vulnerability - when this attack starts casting, find your buddy and stick to them.
|
| Dissociation | - The Hippokampos' head detaches and prepares to charge across one half of the arena.
- Watch the head's position to know where it will charge.
- Dissociation lands when the Hippokampos makes its next attack.
|
| Coherence | - One player is targeted with a flare (three triangles) and another player is targeted with a line.
- Players in the line will have damage evenly split between them.
- Players hit by the flare will all take massive damage.
- All players except the flare target should group up within the line to spread its damage as much as possible.
- Have the player targeted by the flare run away from the rest of the group to avoid hitting anyone else.
|
| Sewage Eruption | - The Hippokampos prepares several large AoE attacks centered on random players.
- The placement of the attacks does not move once casting begins, so move out of the danger zone to avoid damage.
|
Related: Final Fantasy 14 Endwalker - How To Unlock Studium Deliveries
Guide To The Third Circle of Asphodelos: The Phoinix
The third boss in Asphodelos is a feathered dragon called the Phoinix (and yes, that's how it's spelled in-game). This is a three-phase fight and, as you can probably guess, will have you and your team taking lots and lots of fire damage. Once again, stepping outside the arena will cause your character to immediately die.
Phoinix's Moves - Phase 1
| Move | Notes |
| Experimental Fireplume | - Experimental Fireplume randomly unleashes one of two attacks, indicated by the Phoinix's casting animation.
- If the Phoinix creates a single, large fireball, the attack lands as a giant AoE centered on the middle of the arena.
- Move to the outer edges of the combat area to avoid damage.
- If the Phoinix creates multiple smaller fireballs orbiting its body, multiple smaller AoE strikes will rain down from above.
- Stay in the center to avoid the initial fireballs, then after a few have landed move to their impact zone to avoid the rest.
|
| Scorched Exaltation | - This attack deals heavy damage to all party members.
- This damage cannot be avoided by any means — be prepared!
|
| Heat of Condemnation | - Targets the two highest-Enmity players (i.e., both tanks) with powerful AoE blasts.
- Keep the rest of the party away from the targets, and have the tanks spread out to avoid getting hit with both strikes.
|
| Darkened Fire | - The Phoinix summons four Darkened Fire enemies.
- Darkened Fire will begin to cast Darkened Blaze.
- Darkened Blaze deals massive damage to all party members - if two or more go off expect a wipe.
- Darkened Fires can only be damaged by the Phoinix's Brightened Fire (see below).
|
| Brightened Fire | - The Phoinix targets four players, assigning each a number matching one of the Darkened Fires.
- The AoE from this attack will destroy the Darkened Fire that has the same number as the targeted player.
- This is the only way to prevent Darkened Fire from casting Darkened Blaze, so be sure that your assigned Darkened Fire is hit.
|
| Cinderwing | - Like Erichthonios' Gaoler's Flail, this attack hits all players on either the left or right side of the Phoinix.
- There is no difference in the Phoinix's animation to indicate which side it will attack.
- Watch the name of the attack. It will be shown as either "Left Cinderwing" or "Right Cinderwing." This tells you which side is currently dangerous.
- Move to the opposite side of the Phoinix to avoid the attack.
|
| Trail of Condemnation | - The Phoinix flies to the edge of the platform and then streaks directly across, damaging everything in its path.
- After Trail of Condemnation is used, Phase 2 begins.
|
Phase 1 Strategy
The most important part of this phase is paying attention. Note what kinds of fireballs the Phoinix throws with Experimental Fireplume, which side its Cinderwing is targeting, and most importantly of all pay attention to the number assignments from Brightened Fire. Failing to destroy a Darkened Fire is the easiest way to lose this boss fight.
Phoinix's Moves - Phase 2
| Move | Notes |
| Flames of Undeath | - Deals damage to all party members.
- Resurrects dead Sunbirds (see Phase 2 Strategy, below) as Sparkfledged.
- Sparkfledged will attack continuously.
|
| Dead Rebirth | - The Phoinix only uses Dead Rebirth if it casts Flames of Undeath when all four Sunbirds are dead and have not been allowed to Tether this cycle.
- Dead Rebirth deals heavy damage to all party members.
- The attack's damage is increased by any overlap on the green circles surrounding the dead Sunbirds.
- If the party survives Dead Rebirth, the fight moves to Phase 3.
|
Phase 2 Strategy
In Phase 2, the Phoinix begins charging its Phoinix Fire gauge. If it fills, the boss unleashes an attack that will kill the entire party. Worse, the Phoinix creates a Blazing Rain effect that deals fire damage continuously to all party members for the duration of the phase. "Speed and coordination" is the name of the game here.
The Phoinix is immune to damage in this phase, so you'll need to kill the Sunbirds that appear; two at first, followed by two more. The Sunbirds have wide arcing attacks that can hit multiple targets, so avoid them as best you can. You'll need to keep the Sunbirds away from each other — if they are allowed to stay too close, they will buff the Phoinix and make you go through another spawn cycle before you can stop Phoinix Fire. Note the green circles around each Sunbird - these remain in play even after the Sunbirds are killed. Make sure these circles overlap by as little as possible, as their overlap directly increases the damage dealt by Dead Rebirth.
Phoinix's Moves - Phase 3
| Move | Notes |
| Fledgling Flight | - The Sparkfledged take positions around the Phoinix, one after the other.
- Each Sparkfledged unleashes a powerful blast towards the center of the arena and beyond.
- These attacks are made in the order the Sparkfledged get into position.
- Move behind each Sparkfledged in sequence to avoid damage.
|
| Experimental Charplume | - A purple AoE appears centered around each player.
- Each AoE deals damage when it lands.
- Spread out to avoid party members getting hit by more than one strike.
|
| Devouring Brand | - Burning Lines will move towards the center of the arena, converging into a cross shape.
- When the lines converge, they will widen in a fiery blast.
- The quadrants between the arms of the cross are safe.
|
| Searing Breeze | - Targets players with circular AoE blasts.
- The location of each blast stays where the targeted player was when casting began.
- Move out of the circles to avoid damage.
|
Phase 3 Strategy
You'll have to pay attention to multiple AoE attacks at once during this phase. Stay focused and pay attention to details like the order in which the Sparkfledged respond to Fledgling Flight. After Phase 3, the Phoinix will repeat the phases in order, mixing in moves from other phases to keep things interesting.
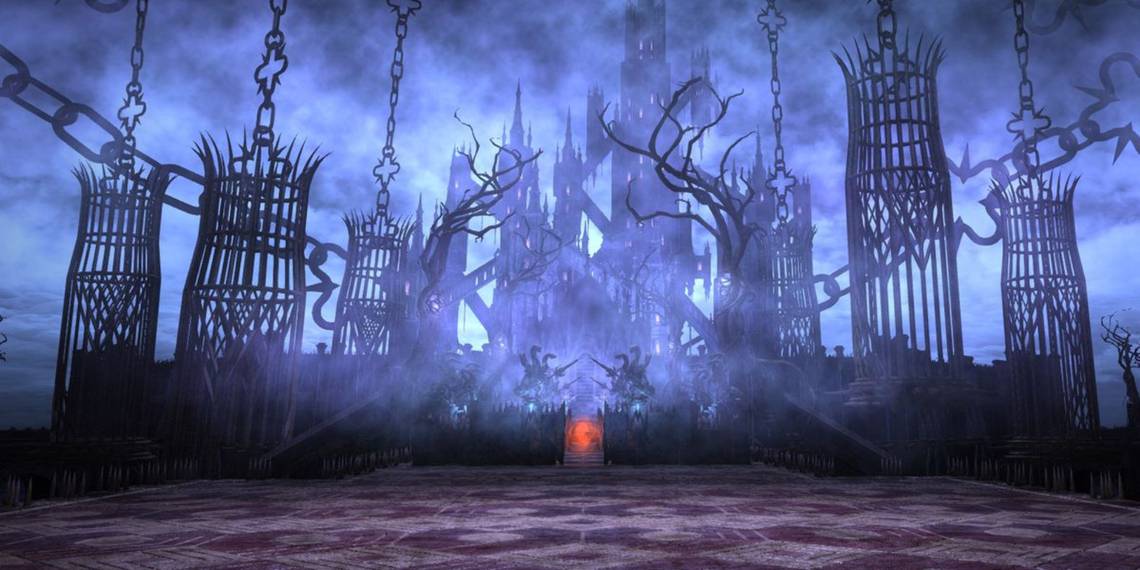
Guide To The Fourth Circle of Asphodelos: Hesperos
Looking like he just strolled in from a Castlevania game, Hesperos is the final boss of Asphodelos. Compared to the other battles you've faced just to get this far, the fight with Hesperos isn't as complicated. He is still extremely powerful though, so don't let your guard down!
The first four cycles of Setting the Stage, Pinax, and Mekhane will always appear in the following order:
- Lightning
- Water
- Poison
- Lava
The random nature of Setting the Stage means that the elements won't necessarily be deployed in this order — it just means that you won't see a Water Pinax until at least the second cycle, a Poison Pinax until the third, or a Laval Pinax until at least the fourth cycle.
Hesperos' Moves
| Move | Notes |
| Elegant Evisceration | - Hesperos deals heavy damage to a single target.
- Tanks should take this hit, with healers ready to patch them up right away.
|
| Setting the Stage | - One or more of the combat area's quadrants is primed with an elemental attribute.
- The effects of Pinax and Mekhane are determined by the element of the quadrant that activates when they are used.
|
| Pinax | - One of the elemental quadrants primed with Setting the Stage activates, creating a hazard that inflicts a status effect if entered.
- A lightning quadrant will inflict Electrocution.
- A water quadrant will inflict Dropsy.
- A poison quadrant will inflict Pollen.
- A lava quadrant will inflict Burn.
|
| Mekhane | - Hesperos unleashes an elemental attack matching the element of the current Pinax.
- Levinstrike Mekhane follows a lightning Pinax and deals damage to each player based on how close they are to the center of the arena.
- Move to the far corners to minimize the damage you take.
- Well Mekhane follows a water Pinax, and knocks all players back from the center of the arena.
- Run to the center to avoid getting thrown out of the arena.
- Acid Mekhane follows a poison Pinax, and places a circular AoE on each player that will deal damage when it lands.
- Spread the party out so each teammate is only affected once.
- Lava Mekhane follows a lava Pinax, and deals massive damage spread evenly among all players it hits.
- Group the party together to spread the damage out as much as possible.
|
| Decollation | - Hesperos deals a large amount of damage to all party members.
- This damage cannot be avoided by any means.
|
| Hell Skewer | - Hesperos turns to face a random player and targets them with a line attack that reaches the edge of the arena.
- Get out of the line of fire right away to avoid damage.
|
| Bloodrake | - Hesperos deals damage to all players then unleashes either Belone Coils or Belone Bursts.
|
| Belone Coils | - Four circles appear, each with the icon of a role.
- A player in a circle will take damage, but if the icon of their circle matches their role they will be killed outright.
- Each circle that does not damage or kill a player instead inflicts a stack of vulnerability on the entire party.
- Have one player stand in each circle, being careful to avoid matching roles.
|
| Belone Bursts | - A green-and-black orb will appear for each player.
- Each orb will select a different player and begin to slowly move towards them.
- An orb will explode if it touches any player, not just its intended target.
- If the player that triggers an orb explosion is of the same role as the icon over the orb, that player dies.
- Otherwise, they are afflicted with a stack of Thrice Come Ruin. Three stacks of Thrice Come Ruin will inflict Doom on the target.
- Run into orbs that don't match your role to save your teammates.
- Ideally, everyone can take one orb intended for somebody else to spread out Thrice Come Ruin stacks.
|
| Direction Shift | - This attack has four variants, one for each of the cardinal directions.
- Hesperos places a pillar at the edge of the arena denoted by the direction he chooses.
- If Hesperos' sword is glowing or the pillar has a sword icon over it, he follows up with a huge cone attack originating from the pillar.
- Stand against the same wall as the pillar to avoid this attack.
- If Hesperos' cloak is glowing or the pillar has a cloak icon over it, he follows up with a powerful knockback originating from the pillar.
- Get close to the pillar to avoid being thrown out of the arena.
|
Hesperos Strategy
The main challenge when dealing with Hesperos is anticipating his attacks and knowing how to deal with them. Each cycle is unpredictable since he can choose from many different combos. Just take his attacks one at a time and communicate with your team. Bear in mind that this fight does have a time limit since your party can only handle three rounds of Belone Bursts before they start dropping from Doom.
Next: Final Fantasy 14 Endwalker - How To Unlock Expert Roulette


.jpg?q=50&fit=crop&w=320&h=160&dpr=1.5)