Elden Ring’s Liurnia of the Lakes region is a spooky swamp fraught with dangerous enemies. However, it is also filled with interesting nooks and crannies to explore. Stillwater Cave is an early dungeon in the lake itself, situated in the cliffside at its southernmost point. Much like the rest of the region, it can be tricky to safely traverse.
The cavern floor is flooded with poison, and reaching the boss room untainted requires some platforming. The boss itself is a tricky fight, requiring you to dodge high-damage grabs and area-of-effect attacks while also avoiding a lake of poison. In return, you will receive 3,300 runes and the Winged Sword Insignia.
Stillwater Cave Overview

| Stillwater Cave Overview | |
|---|---|
| Bosses | Cleanrot Knight |
| Enemies | Giant Bats, Winged Dame, Miranda Sprouts, Servants of Rot |
| Notable Loot | Winged Sword Insignia, Sage Hood, Sage Robe, Sage Trousers |
Dungeon Guide

The entrance to the cave is marked by two spirit jellyfish. Run past them and to the site of grace within, then continue on into a large open cave. This cave is split into two levels. The lower level is flooded with poison, which will slowly build up on you as you walk in it, and is infested with giant miranda sprouts. The upper level is stocked with servants of rot, who will cast poison spells at you from afar. Try to stay on the upper level wherever possible.

Pick up the Golden Rune [3] on the corpse here, then follow the ledge to the right, around the poison lake. Be careful of the giant bat hiding in an alcove along the way. Keep moving along the ledge towards the servants of rot, who will begin to shoot poison bolts at you. Quickly close the distance and kill them to avoid taking too much damage. Below are another two giant miranda sprouts, surrounded by yet more servants of rot. Jump the gap ahead, to a ledge with two more servants of rot. Travel east towards a tunnel.
If you fall to the lower level, move towards the area with the two giant sprouts, where you can follow a slope to climb back up. Use the rocky outcrops on the walls to stay out of the poison lake and allow your poison buildup to lower.

You will arrive at a cave which has a corpse at its centre, surrounded by poison. Two giant bats hang above the corpse, and a winged dame hides in the gloom to the east. Lure them out one-by-one to avoid being overwhelmed. The corpse itself carries the Sage Hood, Robe, and Trousers. Two more corpses at the eastern side of the room have fifteen serpent arrows and a Golden Rune [5] on them.
Leave this room and keep heading southwards, hugging the wall. You will see another corpse with an item on it ahead. The area surrounding this corpse hides a further three giant bats and a servant of rot, who will ambush you as you move forwards. Kill them and grab the Glowstone from the corpse. Jump across the gap to the west, towards a second servant of rot, then continue east down the slope.
If you wish to clear out the lower tier of the cave, head north through the poison lake. Make sure to stop at any rocks which rise above the poison, to allow your build-up to abate. The only reward for clearing the lower tier is a Golden Rune [6] on the body by the giant miranda sprout duo.
Giant miranda sprouts are vulnerable to fire damage, and causing them to ignite will make their poison clouds disappear.

Keep going east into a tunnel with a poisoned floor, which contains two servants of rot. Continue on into a large chamber, which has a wooden walkway crossing another poison floor and five more servants of rot, who are crouched down. At the end of this chamber, drop downwards towards the boss door. Grab the two Poison Greases on the corpse here, then traverse the mist.
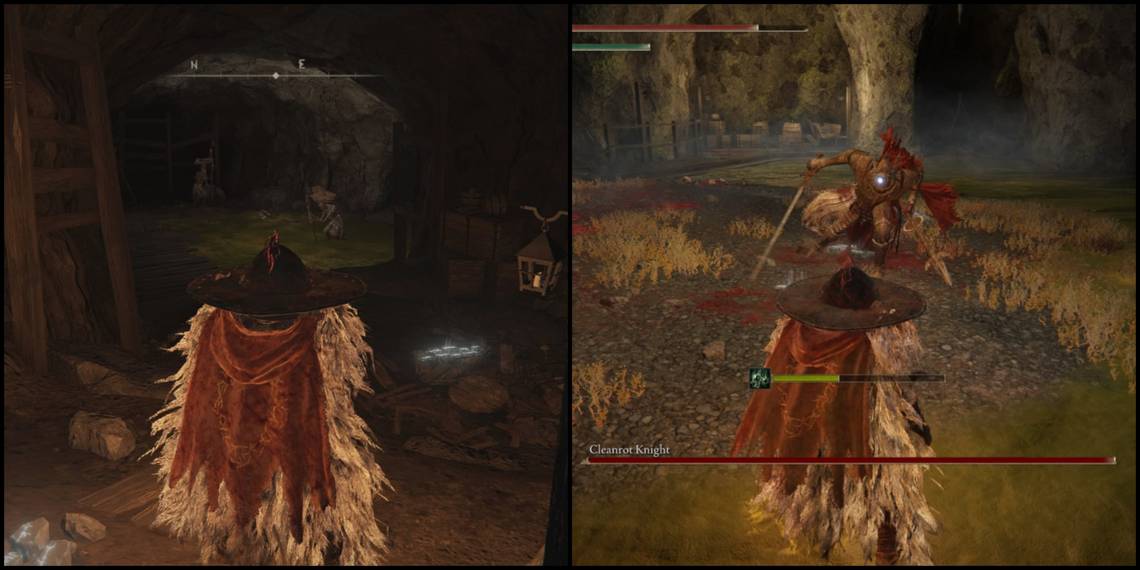
Cleanrot Knight Boss Fight

The Cleanrot Knight is an intimidating boss in itself, with fast, hard-hitting attacks, irritating area spells, and a devastating grab. On top of these, the arena you will have to fight her in is itself hazardous. The floor is drenched in poison, which will slowly build up as you stand on it. Rolling in this poison will cause it to build up even faster, even if you are not standing on it. This is not the only status effect you’ll have to worry about — the Cleanrot Knight’s attacks will infect you with scarlet rot, which will slowly chip away at your health.
Neutralising Boluses, which cure poison build up, are particularly useful in this fight. You can purchase them and their recipe from the Nomadic Merchant near the Coastal Cave in Limgrave. The Flame Cleanse Me incantation is also useful, and will remove both poison and scarlet rot build-up. It can be found in the camp near the Church of Vows in Liurnia.

For melee builds, make sure to always fight on solid ground, out of the poison pool, and be wary of where you roll. Remember to dodge into the Knight’s sweeping attacks, and sideways away from the thrusting attacks.
Although the boss arena is fairly large, with plenty of space in which to maintain distance from the Cleanrot Knight, ranged users may struggle moving around on the poisoned floor. Keep the Knight distracted with summons which can tank a few hits, such as the Godrick Soldier Ashes or any other ashes else which carry shields. When you have to back off, run to a safe, non-poisonous area before continuing to attack.
After defeating the boss, you will receive the Winged Sword Insignia, which increases the damage dealt by successive attacks.

| Cleanrot Knight Attacks | |
|---|---|
| Sweep Attack | The Cleanrot Knight sweeps her sword in a short arc, which is sometimes followed by a much wider sweep. Counter: Roll into the sweep. If a wider sweep follows, the Knight will be open to an attack. |
| Thrust | The Knight stabs quickly forward with her spear. This is often followed by a quick thrust with both weapons. Occasionally, the Knight will then leap backwards. Counter: Dodge backwards when the Knight winds up her first thrust, then maintain the distance on subsequent stabs. |
| Shove | The Cleanrot Knight crosses her weapons, then shoves them forward with a golden light. Counter: Dodge to the side, positioning yourself behind the Knight for an easy hit. |
| Glowing Thrust | The Cleanrot Knight’s spear glows with a golden light, before she thrusts forward, causing spears to thrust up from the ground. Counter: Dodge to the side away from the thrust, then avoid the glowing lights on the floor. |
| Glowing Sweep | The Knight’s sword glows, followed by a sweep attack which causes spears to shoot up from the floor. This is often followed by a thrusting grab. Counter: Dodge into the sweep, then move backwards away from the glowing light to avoid the spears from the floor. |
| Thrusting Grab | The boss’s spear turns fully golden, before she rushes forward with it lowered. At the end of her charge, she will thrust the spear forward and lift you above her head, dealing a large amount of damage and infecting you with scarlet rot. Counter: Dodge sideways at the end of her charge. If you are hit but survive the thrust, quickly cure the rot with Flame Cleanse Me or preserving boluses. |


.jpg?q=50&fit=crop&w=320&h=160&dpr=1.5)


